Red Hat OpenShift AI installation
The fundamental piece and operational hub will be the Red Hat OpenShift AI platform, running in our Single Node OpenShift. The RHOAI operator provides data scientists and developers the possibility to work within a common platform where they can collaborate during the entire model lifecycle, making use of both containerization perks and several machine learning and data analytics capabilities.
-
Open the OpenShift Web Console and log in using the credentials provided with in the lab instructions. The Console URL is:
https://console-openshift-console.apps.cluster-79242.dynamic.redhatworkshops.io-
User:
<ocp_user> -
Password:
<ocp_password>
-
-
Navigate to the Operators tab on the left panel. Then select OperatorHub.
-
Type
OpenShift AIto search the item in the operators' catalog. -
Select the Red Hat OpenShift AI operator and click on Install. Make sure that the selected Version is 2.16.0 onwards. The most recent one will be displayed by default.
-
The operator will create the
redhat-ods-operatorproject. Review the rest of the parameters and press Install to start the operator installation. -
When the installation finishes, we need to configure the DataScienceCluster custom resource. Select Create DataScienceCluster
-
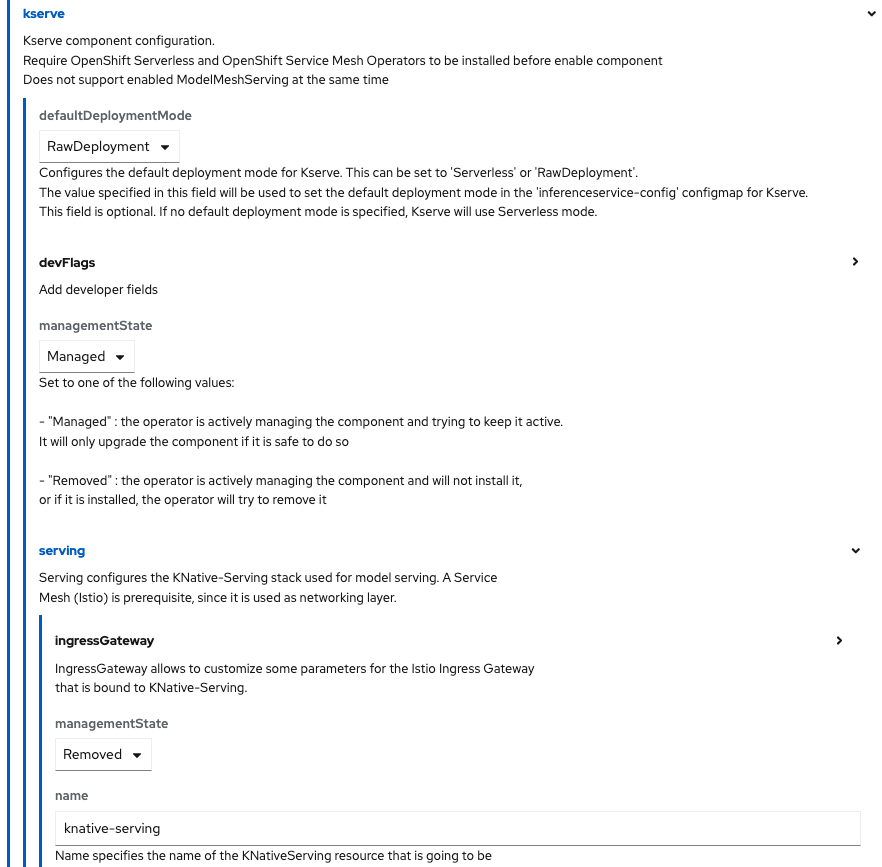
Once in the configuration page, scroll down and click Components. Here you can see a list of all the components that can be enabled/disabled from Red Hat OpenShift AI. It’s on this step when we enable the different components. Reproduce the following setup:
-
Locate and select the kserve component. Unless otherwise specified, the default deployment mode used by kserve will be Serverless. Change the defaultDeploymentMode to RawDeployment and verify that the managementState shows Managed.
-
Also, under serving, we need to modify the KNative-Serving stack used for model serving. As mentioned before, the RawDeployment mode does not use KNative. Therefore, we need to switch the managementState to Removed.
-
Finally, scroll down to the trustyAI configuration and enable the component by switching again the managementState field to Managed.
-
-
The configuration should look like this:
-
Keep the rest of the default values and press Create.
-
However, as KServe RawDeployment mode does not require a service mesh for network traffic management, we can disable Red Hat OpenShift Service Mesh. To do so, navigate to the DSC Initialization tab, inside our operator.
-
In the DSC Initialization tab, you will see the DSCI resource created during the operator installation. Select default-dsci.
-
At the top, you will see that the resource is still Progressing, but if you scroll down, you will see an error message indicating that there was a problem trying to find the Service Mesh Operator subscription.
-
Click on the YAML tab in the details page to modify the resource definition.
-
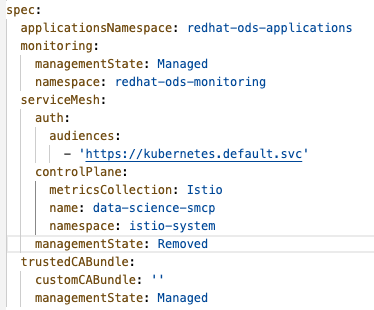
Locate the
serviceMeshcomponent and change themanagementStatefield toRemoved.
-
Then, click on Save.
-
Wait for the Phase to become Ready. This will mean that the operator is successfully configured and can be used.
Now, we should be able to access the OpenShift AI Web Console. On the right side of the top navigation bar, you will find a square icon formed by 9 smaller squares. Click it and select Red Hat OpenShift AI from the dropdown menu:
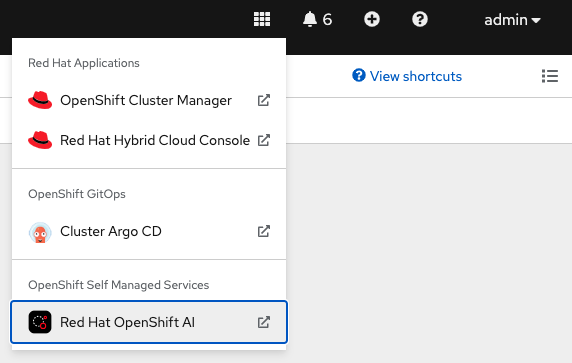
A new tab will open. Log in using your OpenShift credentials. You may need to authorize access to our user. If so, click Allow selected permissions and you will be redirected to the Red Hat OpenShift AI landing page.