Pipelines execution
Red Hat OpenShift AI gives the possibilities to create pipelines by dragging and connecting Notebooks using the Elyra extension. Another alternative, -and the one we will use- is by importing an existing pipeline in YAML format created using the KubeFlow Pipelines SDK. This programmatic platform uses Python to simplify the process of writing and building the pipeline.
Import Pipeline
Once the server is set up, we will create a pipeline to fully automate the process. This pipeline will collect new data from the BMS application and use it to retrain a new model. The performance of this new model will then be compared against the existing one. If it outperforms the current model, it will be uploaded to the S3 bucket in MicroShift. This process will be repeated for both the Stress Detection and Time to Failure prediction models.
In order to save some time we will import the pipeline instead of creating it manually. If you want to learn more about how to create pipelines, check the documentation.
-
First, open the Jupyter Environment with the Notebooks used to train the models and test the endpoints.
-
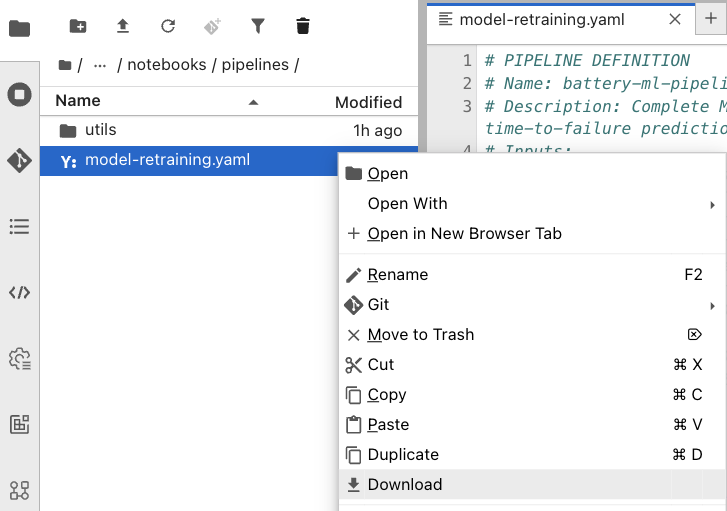
In the folder structure on the left, navigate to the
notebooks>pipelinesfolder and locate the model-retraining.yaml pipeline file. -
Right-click on it and select Download.
-
Save the file locally in your laptop.
-
Now, go back to your Red Hat OpenShift AI Dashboard.
-
Make sure you are in the Pipelines tab inside our project.
-
Select Import pipeline and complete the form as follows:
-
Project: The
ai-edge-projectproject should be selected by default. -
Pipeline name: Name it as
Model retraining. -
Verify that the Upload a file check is marked.
-
Click the Upload button and select the
model-retraining.yamlfrom your laptop.
-
-
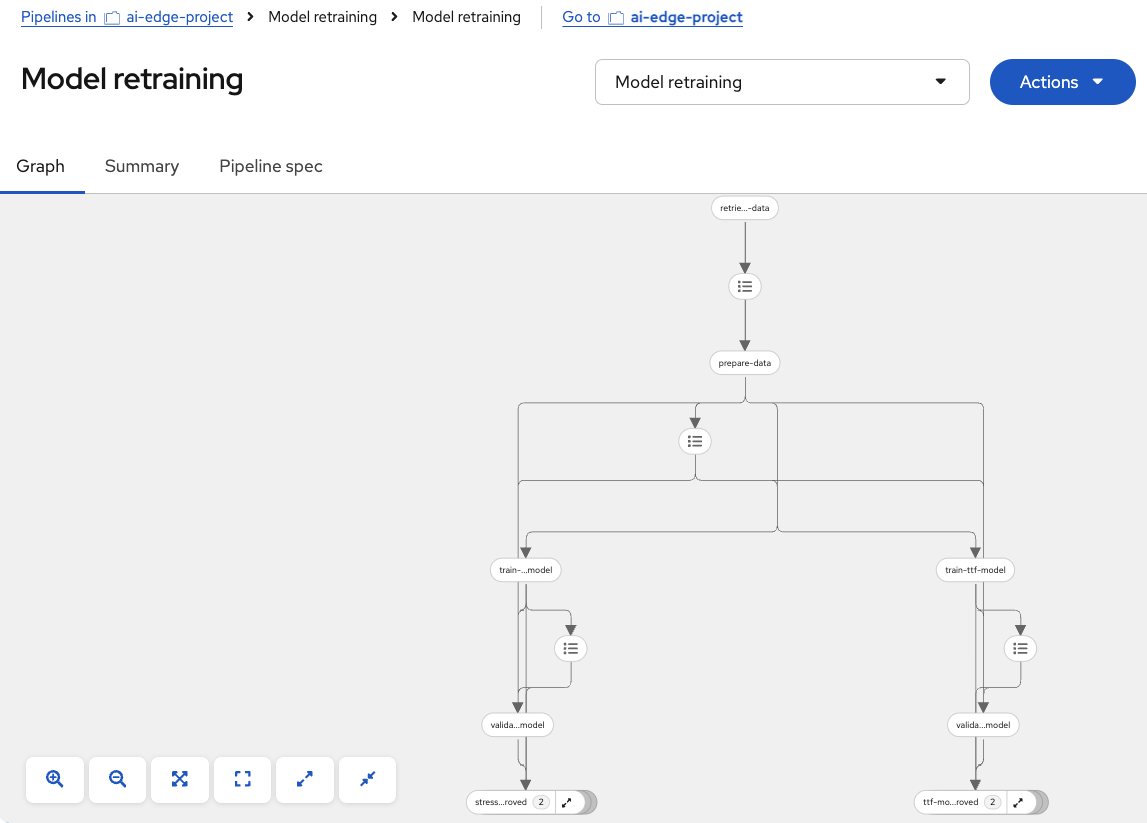
When completed, press Import pipeline.
You should see the different pipeline nodes and steps displayed in a graphical way, like this:
Run Pipeline
To test the pipeline functionality, we will perform a first manual execution. Follow these steps:
-
Once the pipeline is imported, click on the blue Actions button in the top-right corner.
-
Select Create run from the dropdown menu.
-
Configure the pipeline execution as follows:
-
Project: Verify the
ai-edge-projectis selected. -
Experiment: Keep the
Defaultone. -
Name: Type
First run. -
Pipeline:
Model retrainingshould be already selected. -
Pipeline version:
Model retrainingis pre-filled.
-
-
Now, check the following parameter values. You may need to change the InfluxDB URL based on your environment:
Parameter Value aws_access_key_id
minioaws_s3_bucket
inferenceaws_s3_endpoint
http://minio-microshift-vm.microshift-001.svc.cluster.local:30000aws_secret_access_key
minio123influxdb_bucket
bmsinfluxdb_org
redhatinfluxdb_token
admin_tokeninfluxdb_url
https://influx-db-microshift-001.{openshift_cluster_ingress_domain} -
When completed, click Create run.
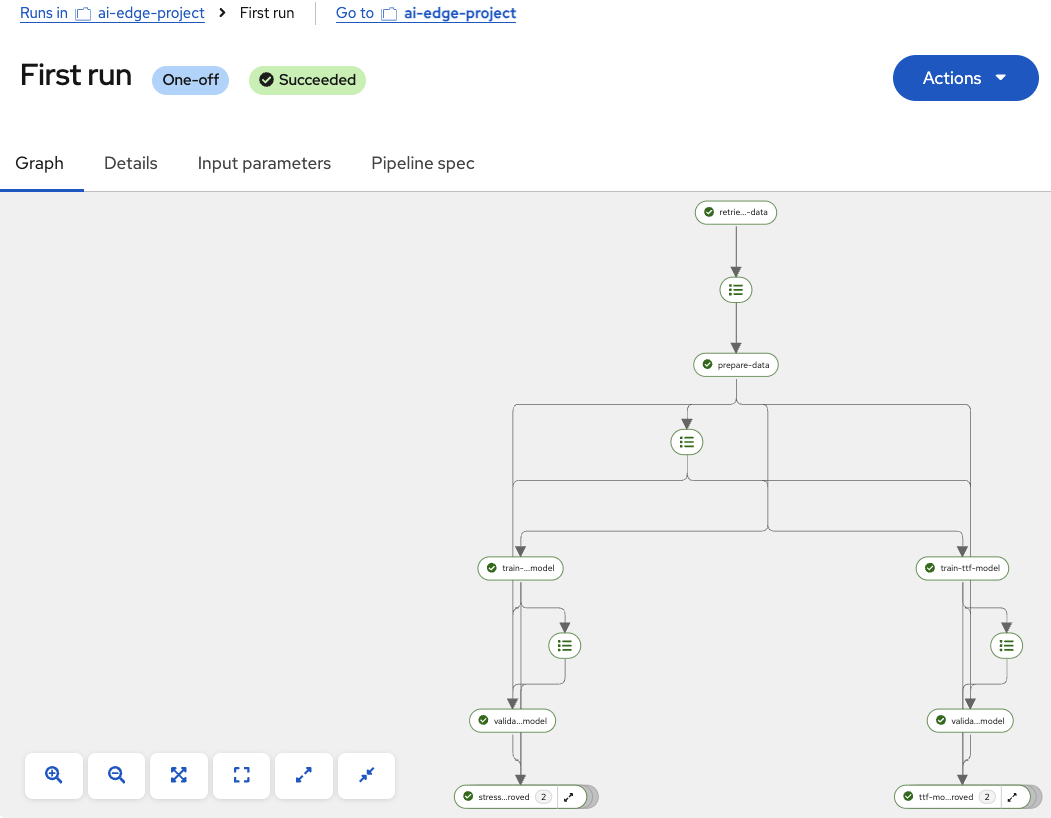
At this point, the pipeline will start executing. The first node retrieves data from InfluxDB in the vehicle, then the data is processed and prepared for model training. Next, the Stress Detection and Time to Failure models are trained in parallel. Once training is complete, the following node evaluates whether the new models outperform the existing ones in the vehicle using fresh data. If not, the models are discarded. However, if the new models show better performance, the final nodes are executed to upload them to the inference bucket in MinIO on our autonomous vehicle.
When the execution finishes, all nodes will be marked with green checkmarks indicating a successful run, as shown in the image below: